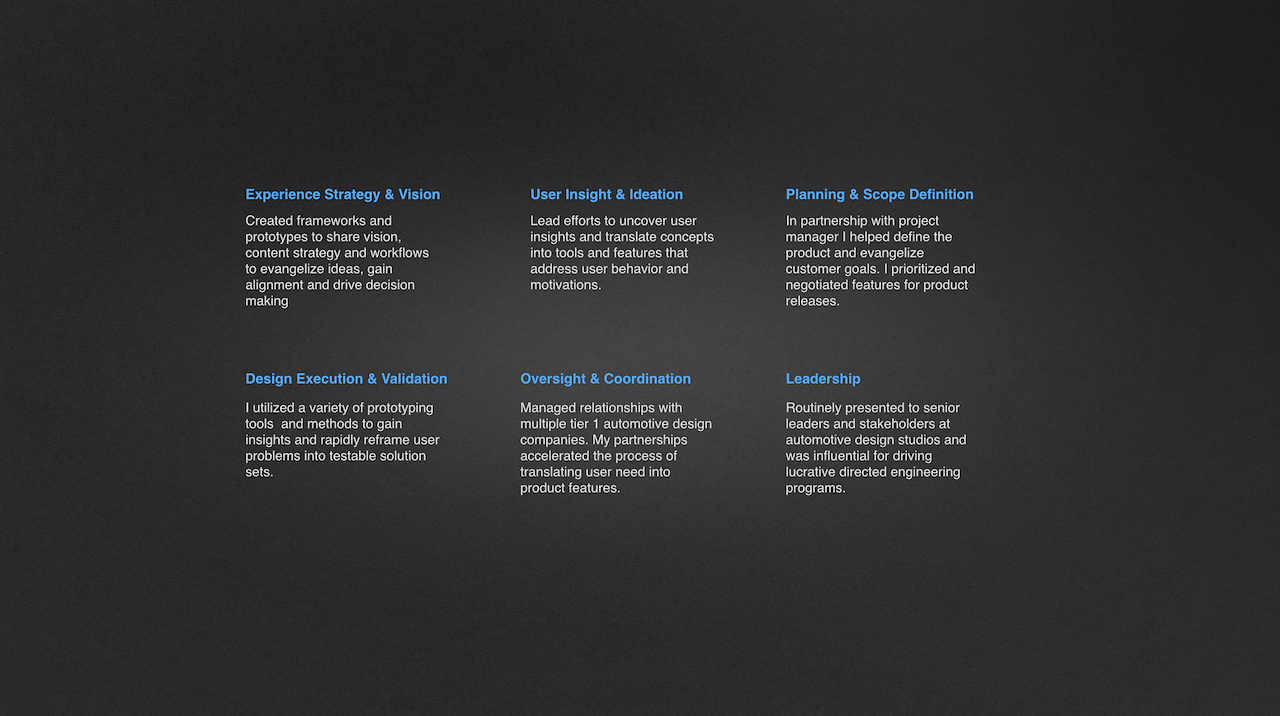
As a seasoned industrial designer with extensive studio collaboration experience, my subject matter expertise uniquely positioned me to drive the Studio Wall project. I was able to quickly establish trust and build empathy, enabling us to uncover deep insights and related solutions quickly.
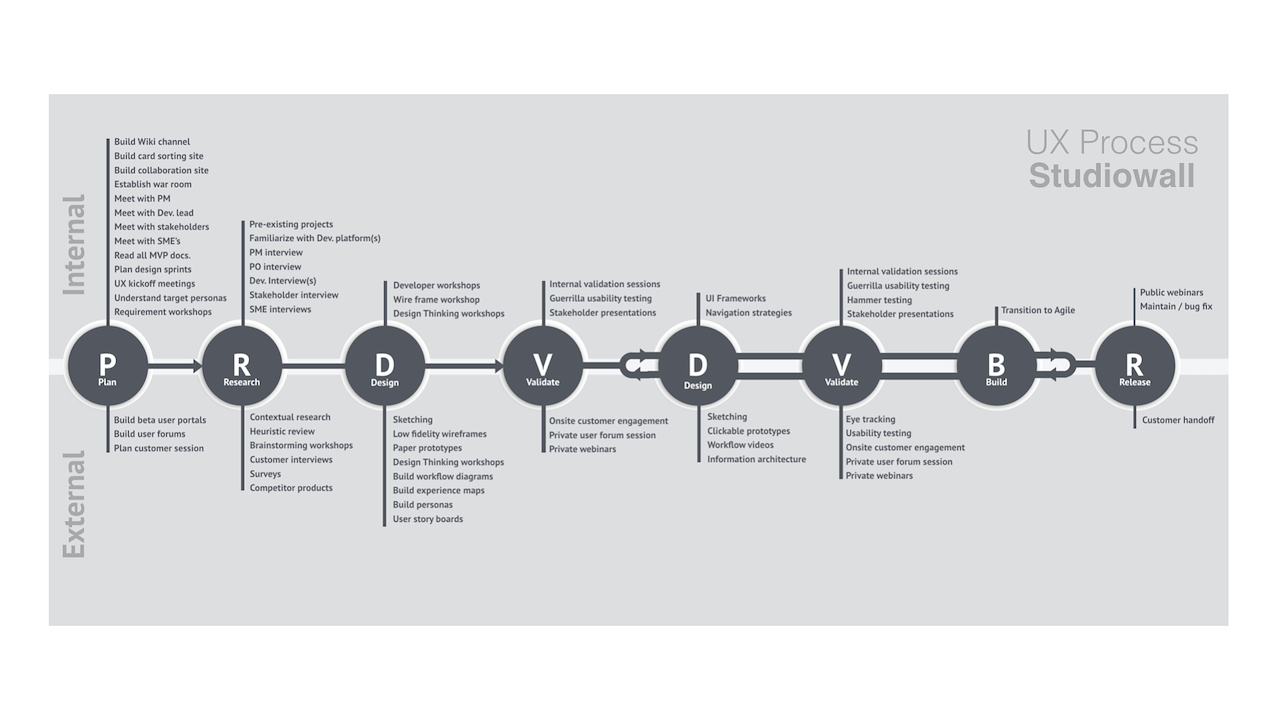
Having a clear process strategy is critical for team alignment and creates a clear path for all stakeholders. Making my design process as transparent as possible is always a prime objective
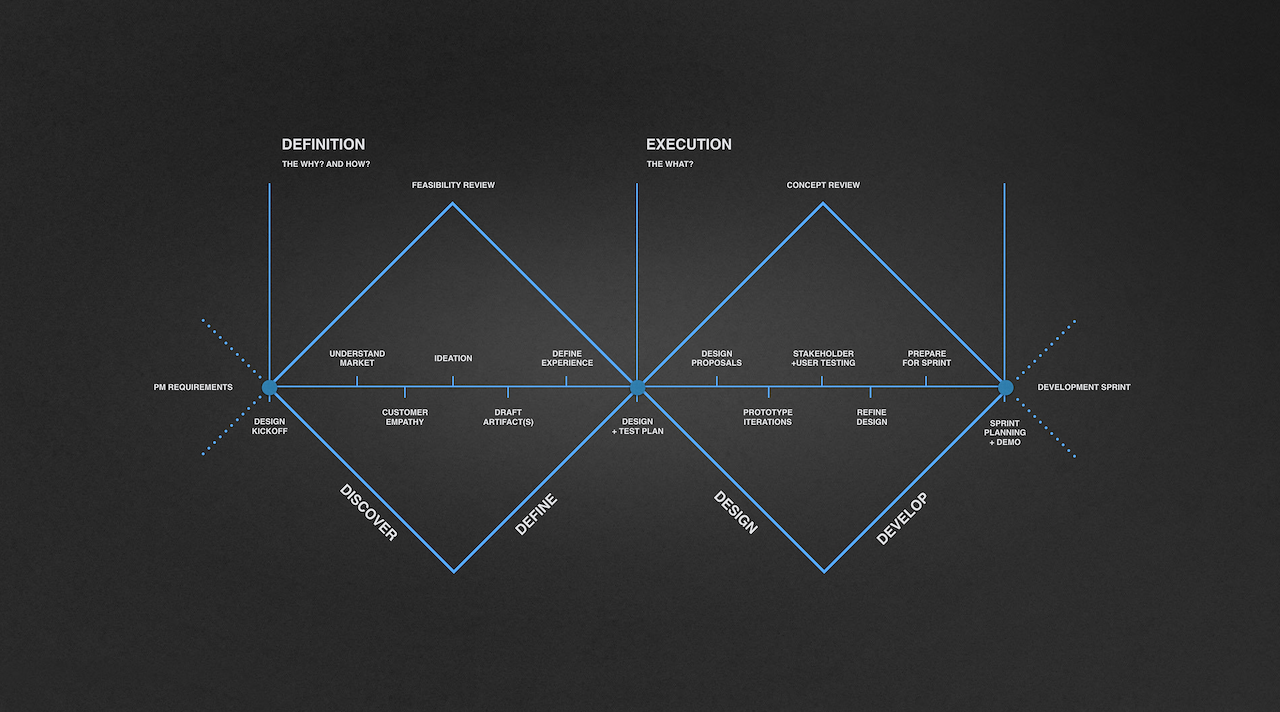
Each two-week design sprint followed a double diamond approach. To ensure that no development bottleneck was created the UX team worked two weeks ahead of development teams

Using Agile development methodologies and practices ensured synchronization of the entire team. Card sorting boards, Wiki documentation, and backlogs were reviewed daily with the appropriate scrum and product owner teams
As a lead UX designer for Autodesk automotive, I played an integral part in developing strategic working relationships with designers and leadership from several major major automotive companies. Throughout the development of StudioWall, I frequently validated new workflows and tools with automotive design studios
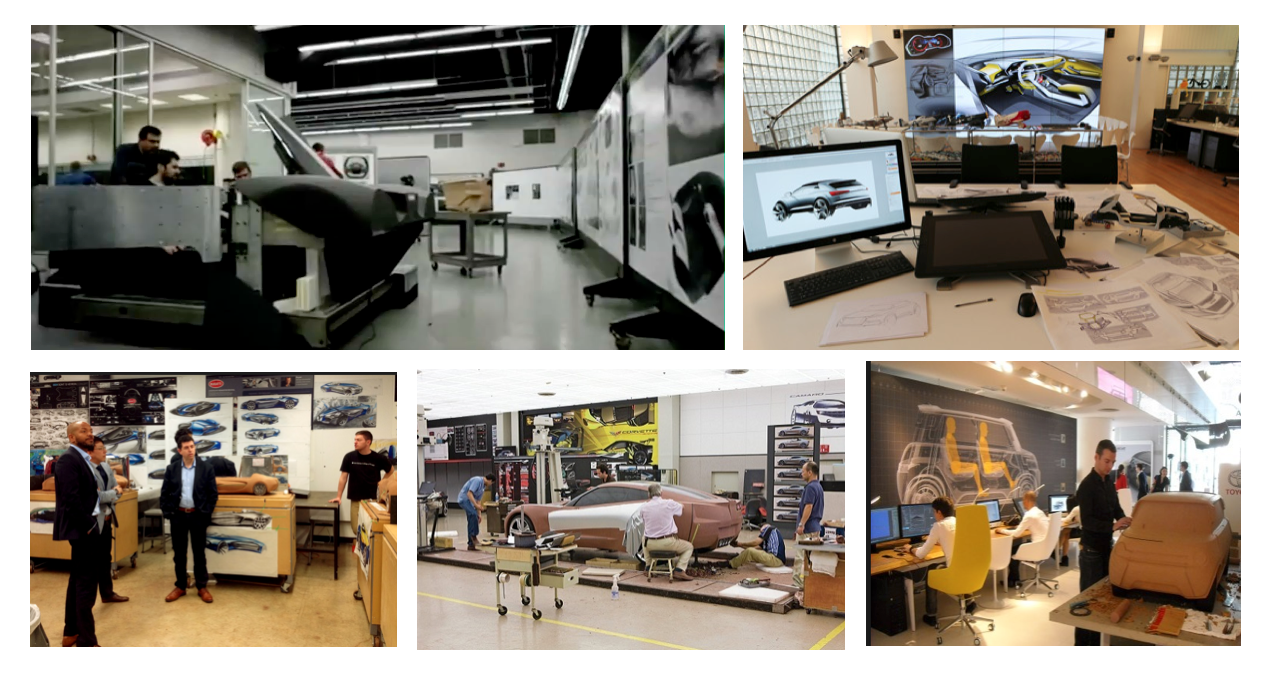
User interviews were conducted on-site in context of work environments. Engagement sessions consisted of user Interviews, persona shadowing, fly on the wall observations, heuristics reviews, usability tests, and usability audits
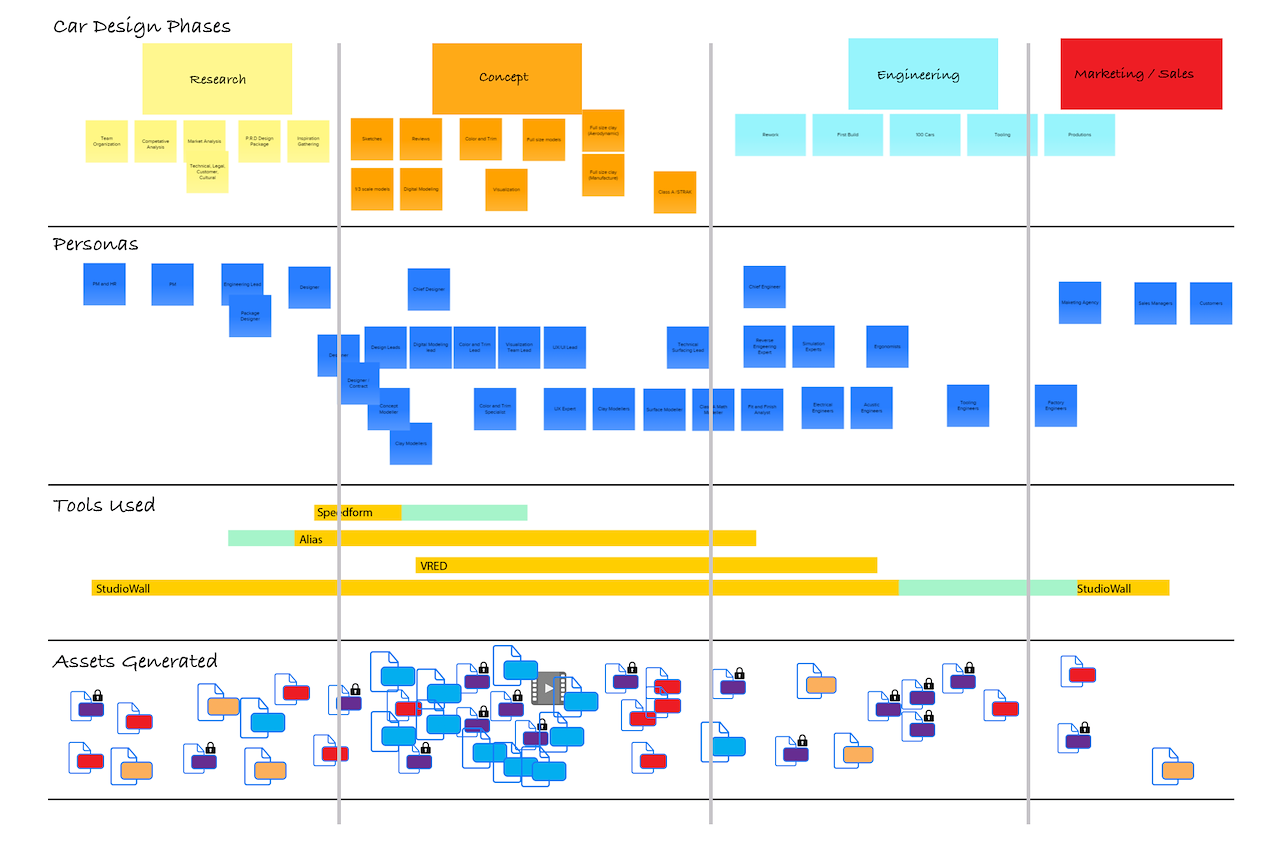
To create exceptional user experiences we need to thoroughly understand our users' challenges, pain points, and motivations.Through this highly detailed process, I identified various stages in the Automotive workflow – from Research to Concept to Engineering to sales. Once the workflows were outlined, I added the personas involved throughout the process.This view gave new perspective into the depth and breadth of the Automotive business.
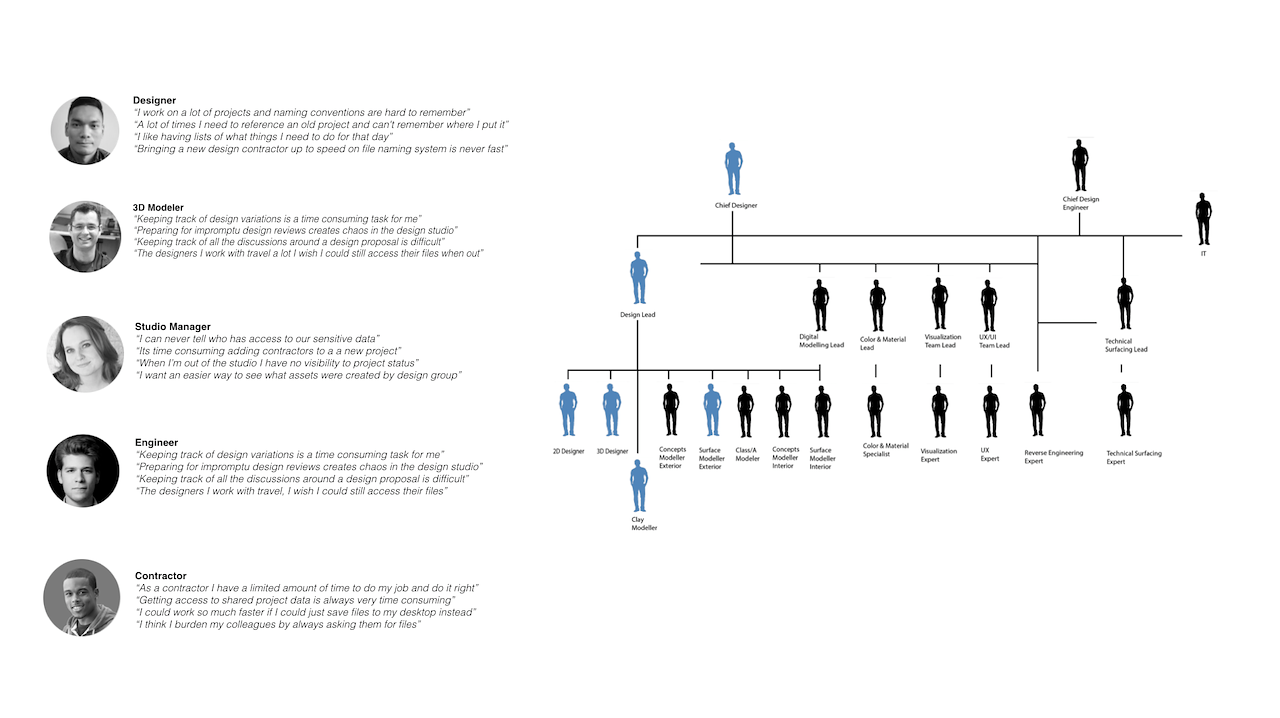
Stakeholder mapping during customer visits was a key process for uncovering design opportunities. Significant time was spent diagraming the network of design assets that needed to be shared between collaborating teams.
User interviews uncovered insights and
opportunities for innovation that were captured
as user stories and associated with a persona for
validation when prototypes became available.
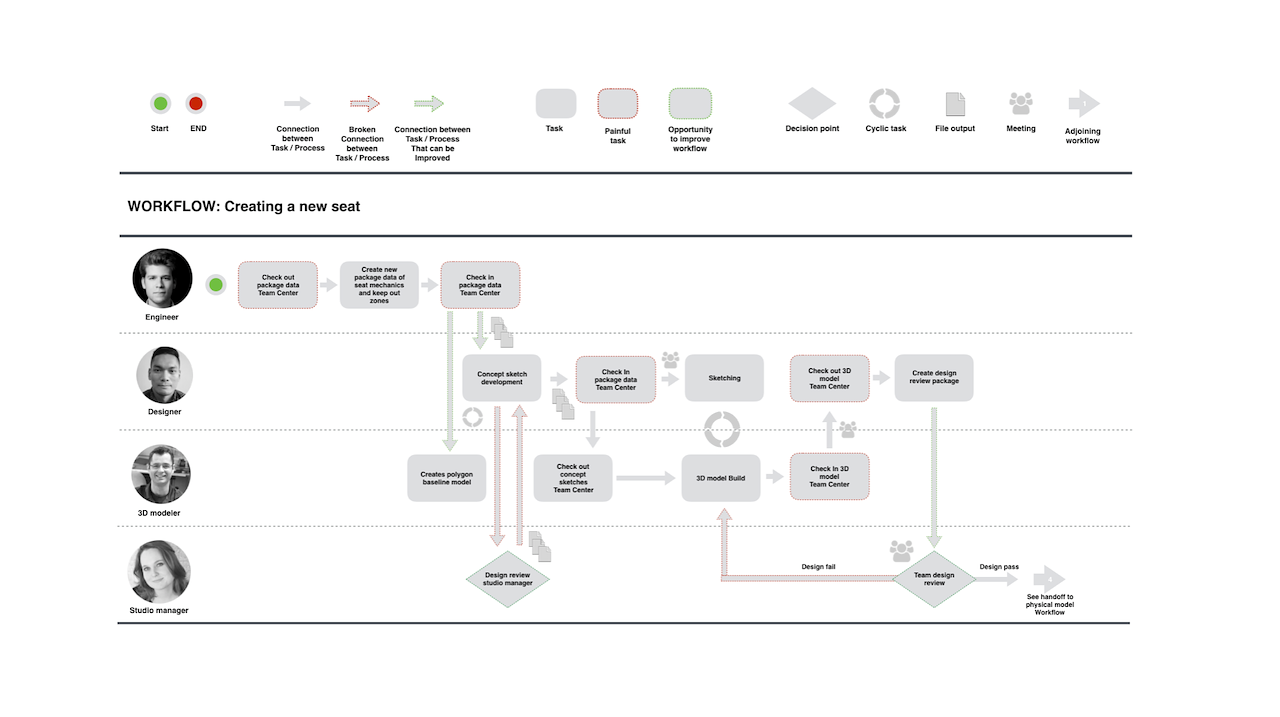
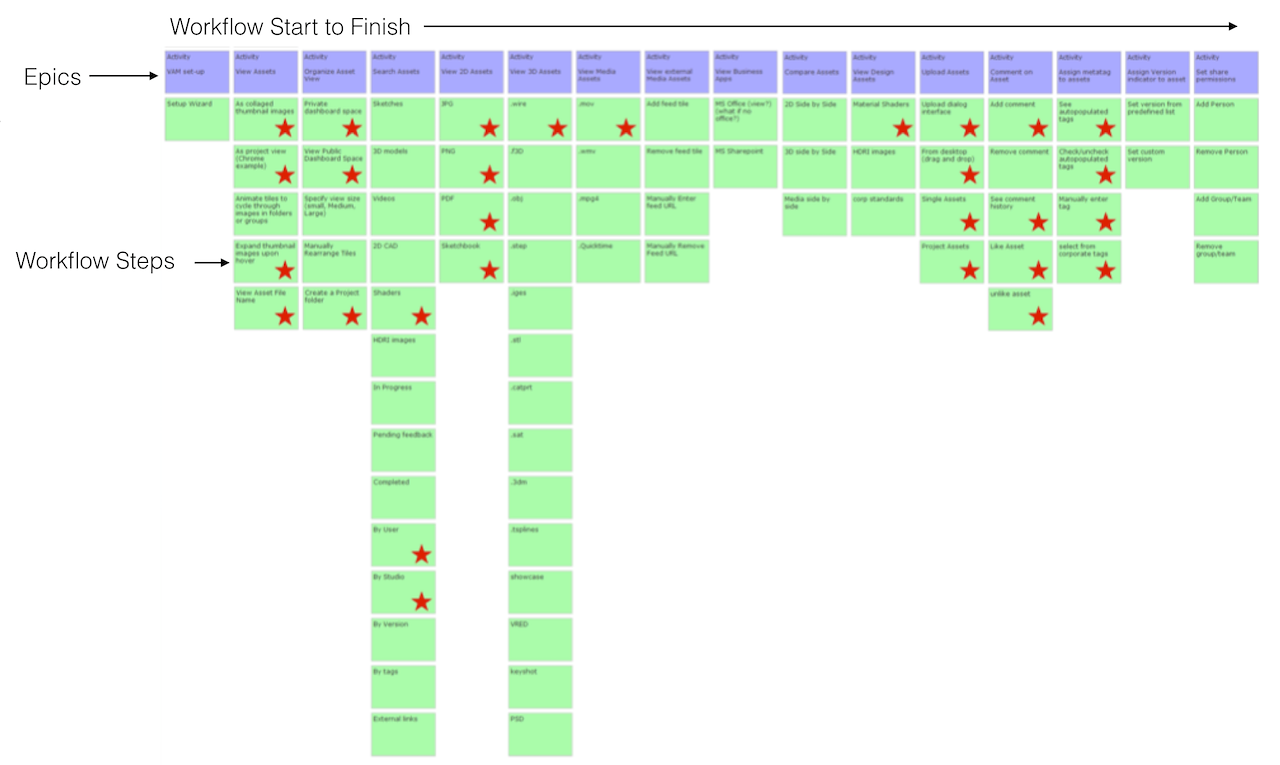
With information captured from user interviews, I created workflow diagrams to get a better understanding of how many design artifacts were created on a typical day and how these artifacts traveled through a design studio.
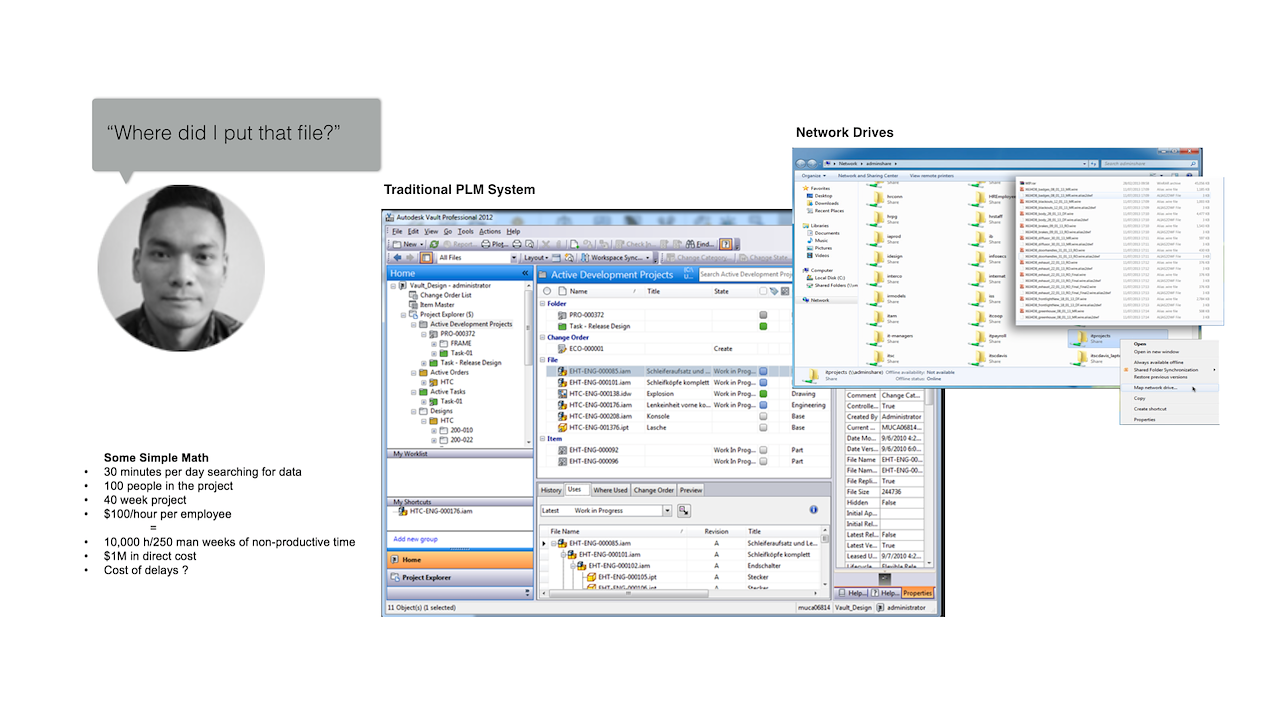
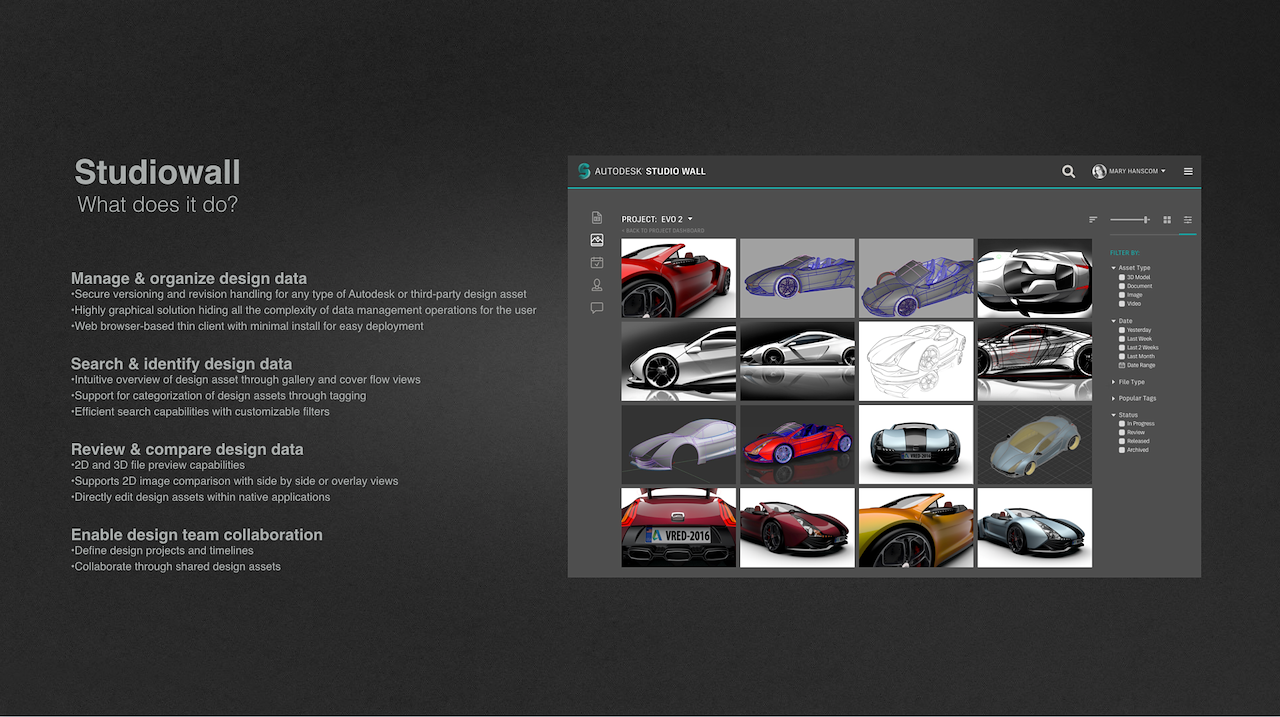
Most Product Lifecycle Management systems were created for engineering services and not very visually engaging or intuitive to use.
In most scenarios, creative users refused to use these systems and resorted to saving business-critical files to their local hard drives where work can get easily lost and becomes difficult to share with collaborators (not to mention proposing a security risk).
To prioritize release features, we
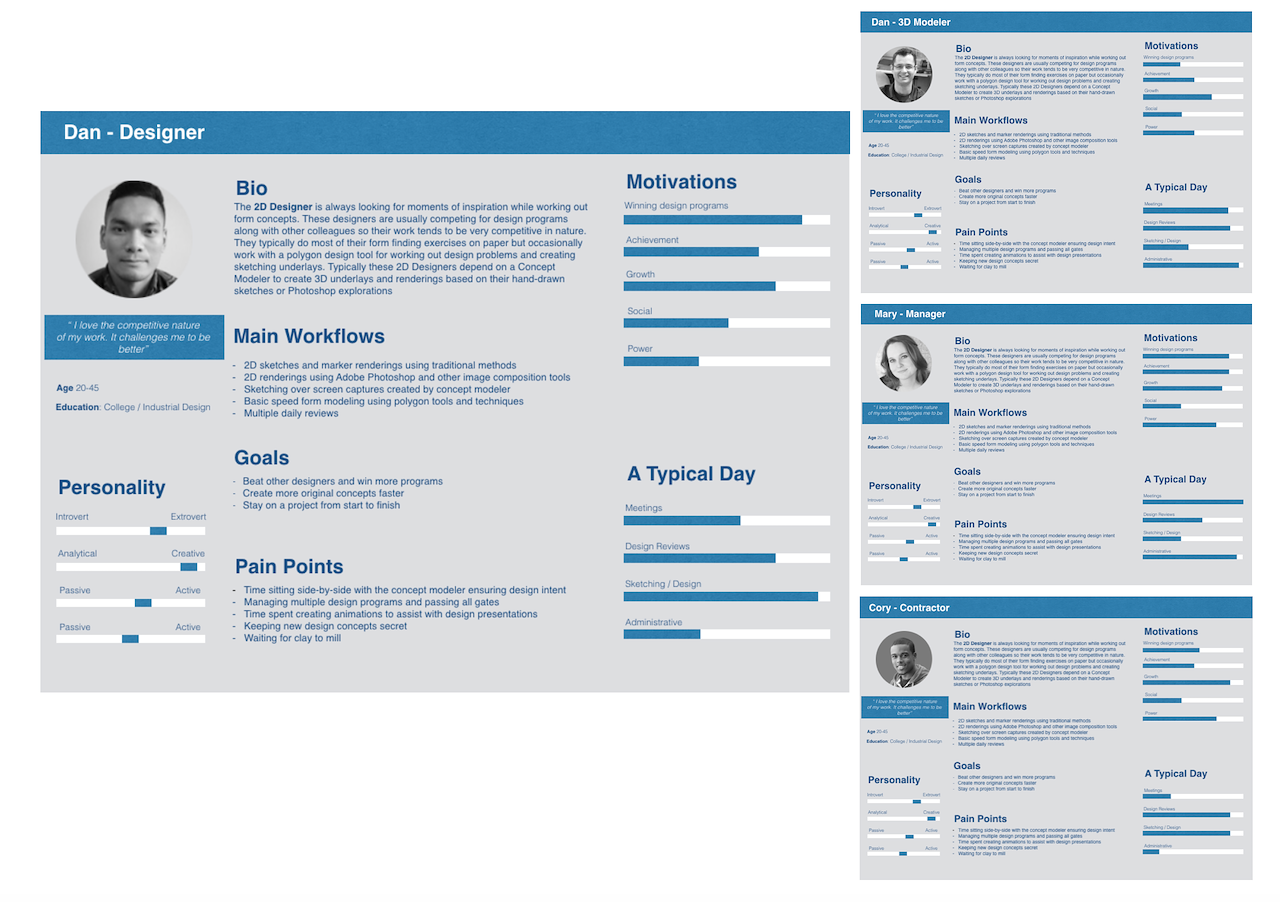
created and continually updated personas to meet changing needs of users. All design proposals were carefully validated and debated relative to each personas needs.
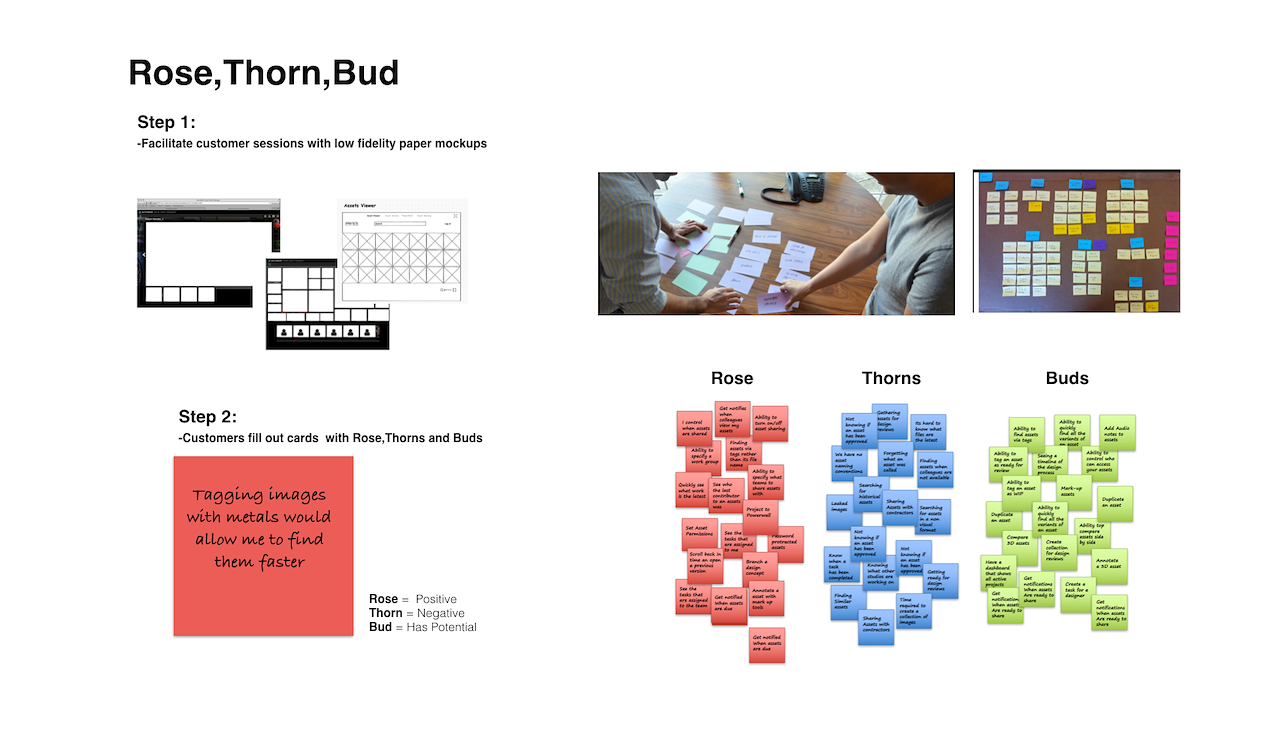
To make all customer engagement sessions interactive, I introduced card sorting exercises at the end of each meeting to capture ideas that were, good, bad or had potential.

To identify customer desires, I instructed them to rank the importance of application functionality from high to low on the X-axis. To understand development complexity I asked each developer to rank functionality complexity from low to high based on development difficulty on the Y-axis. The matrix was then divided into quadrants to identify luxury, strategic, targeted and high volume user experience categories
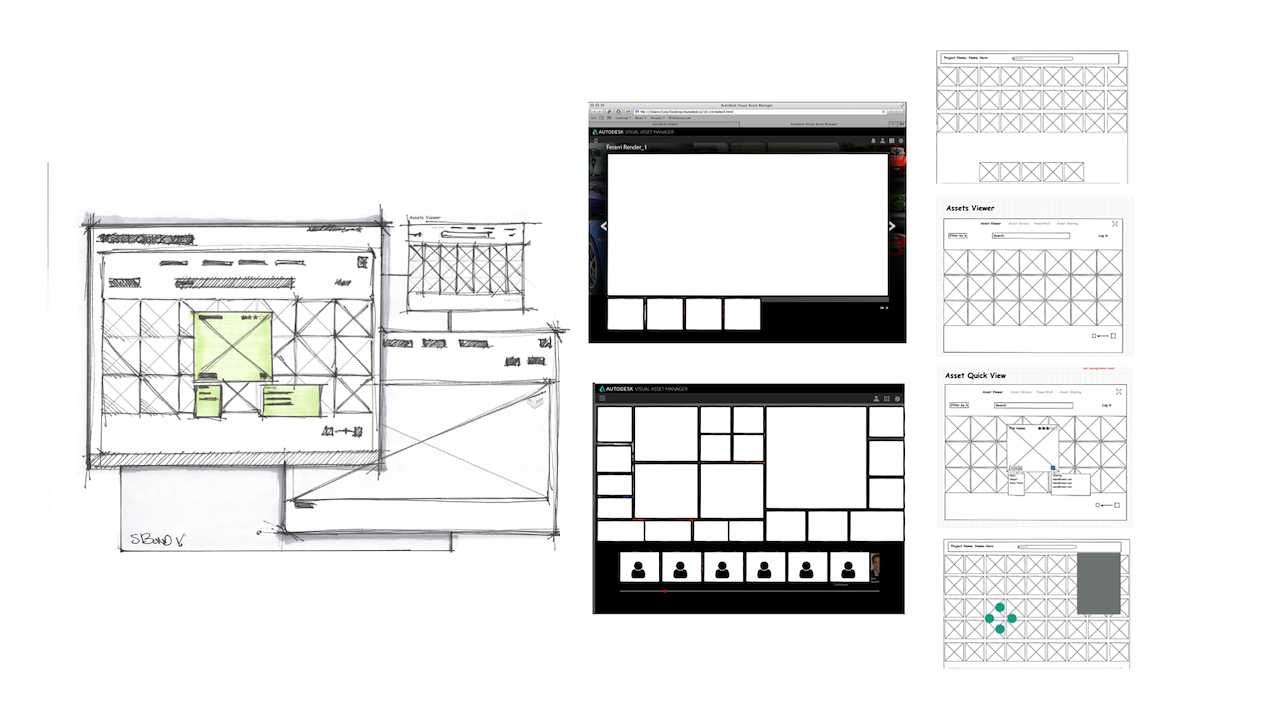
During early ideation phases, sketches, and concepts are presented as solution sets as a way to discuss development impact versus value to the customer.
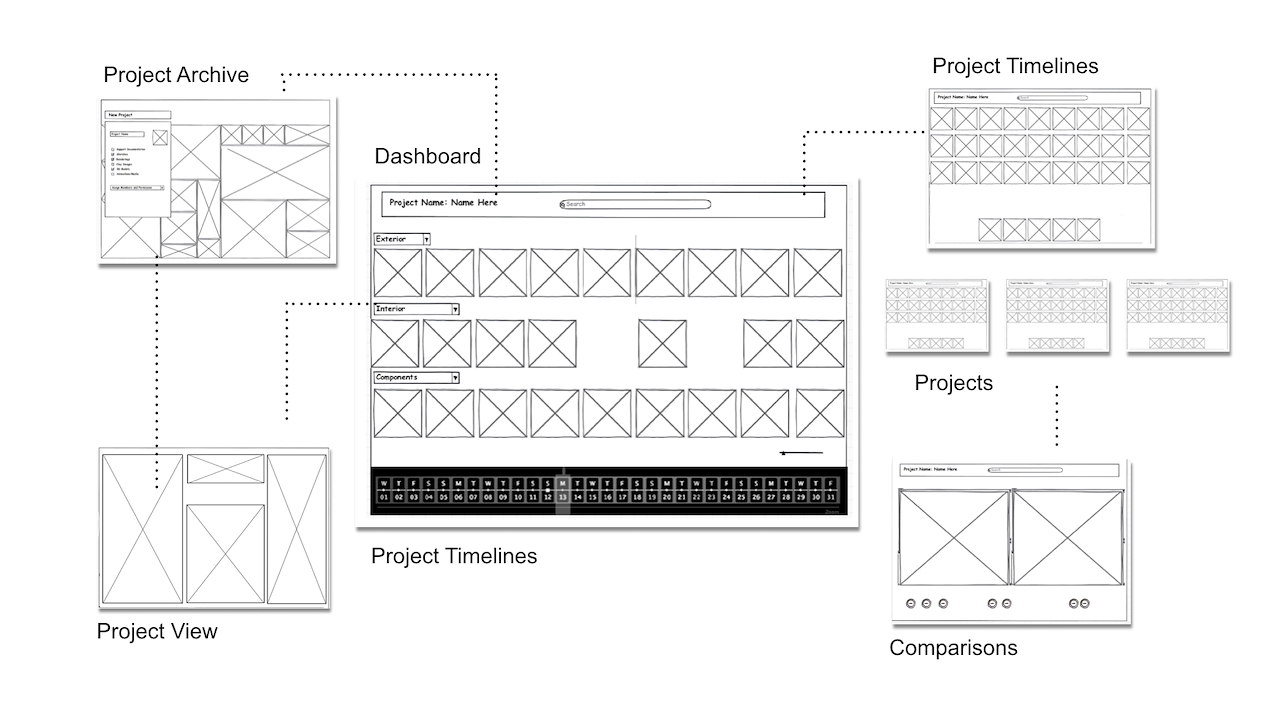
Sketches were converted to low fidelity wireframes to identify user workflows and frameworks needed to support an intuitive user experience.
Wireframes were quickly transitioned to interactive prototypes that were then further validated with all target personas using eye tracking systems
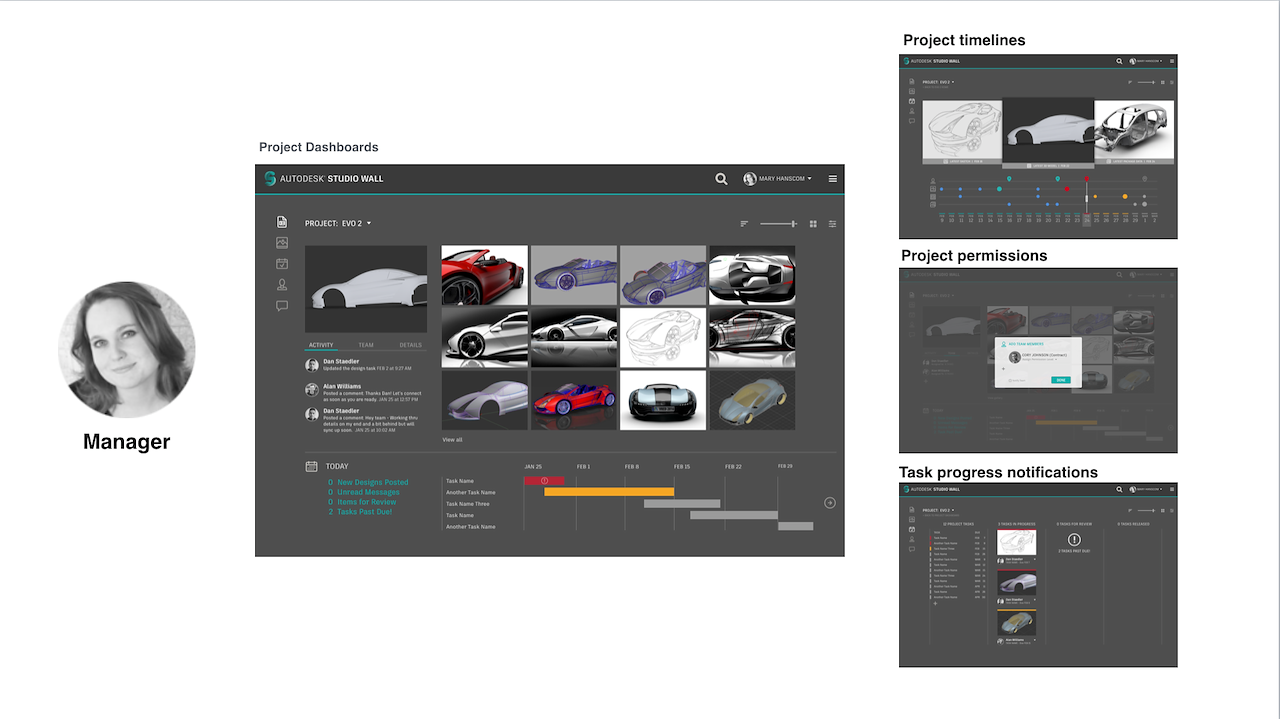
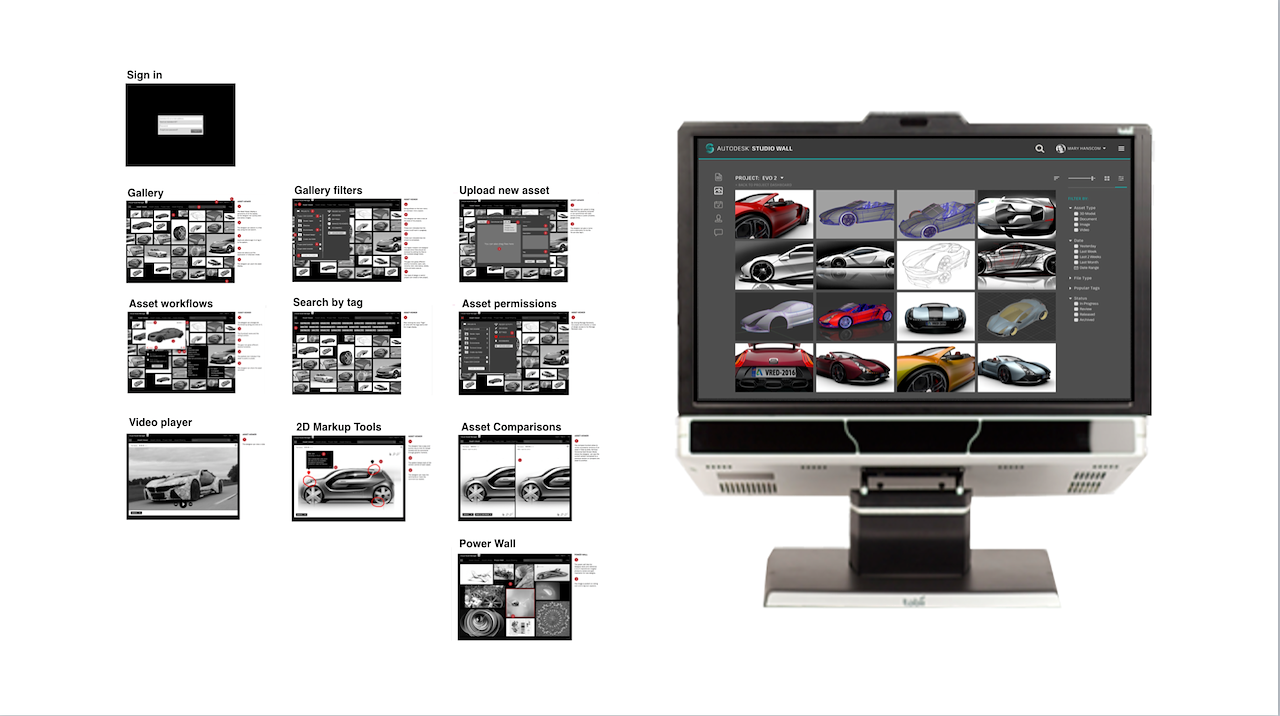
Sample UI of manager interface
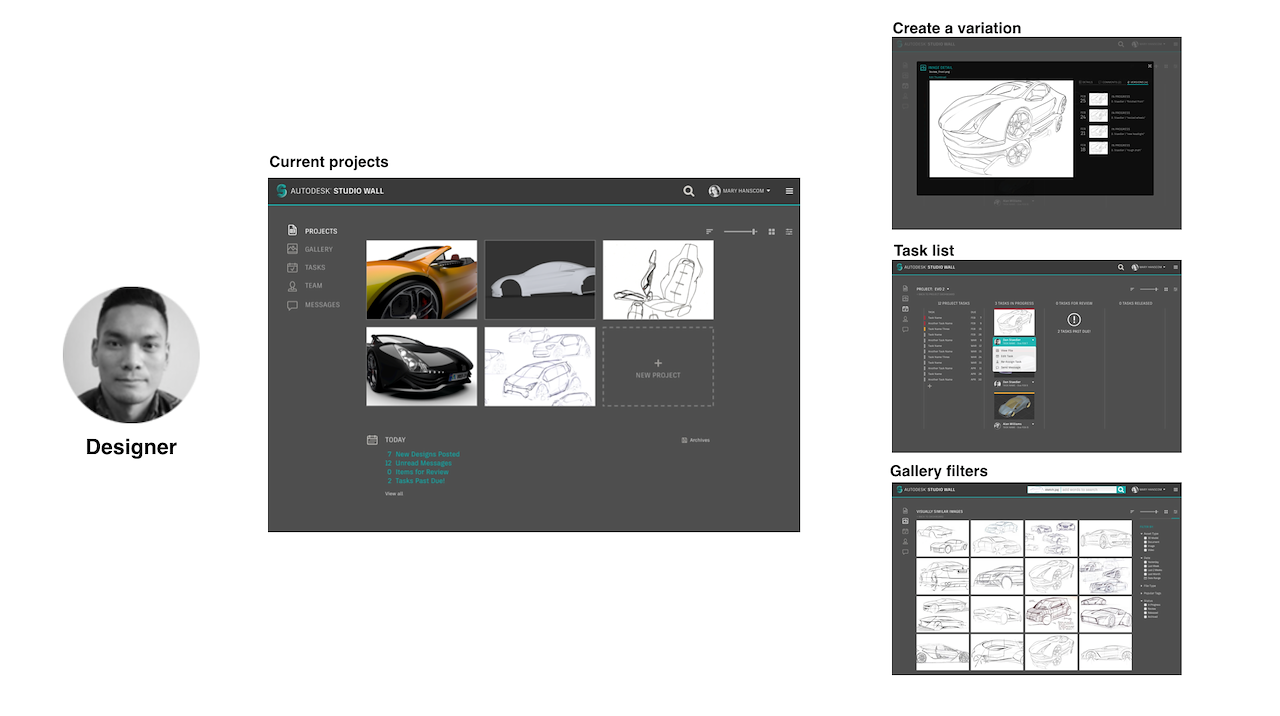
Sample UI of designer interface
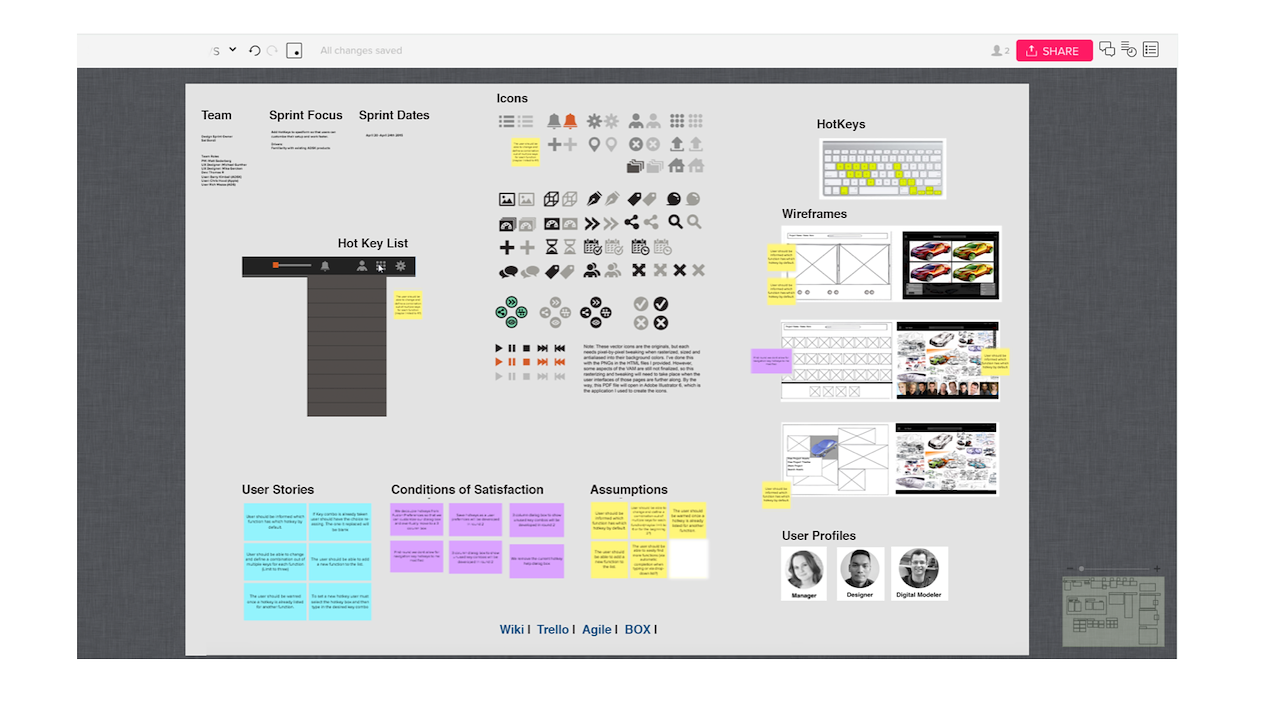
Work transparency is always a guiding principle when working at a fast pace with team members. To enable a collaborative work environment I create and manage cloud-based work boards for capturing all relevant project information throughout a typical two-week design sprint
All insights from user interviews were categorized as new user stories, functionality improvements, and bug fixes.
I created and managed a variety of online card sorting tools for improving team collaboration.
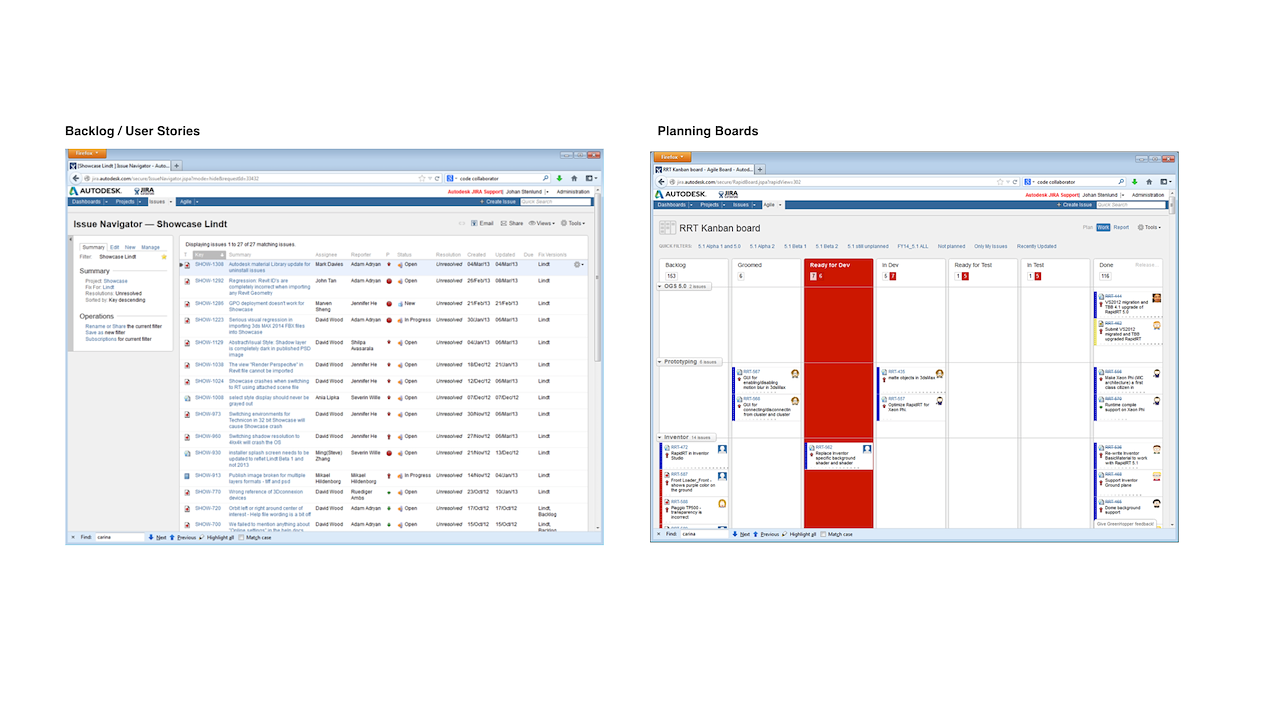
New features, and bug fixes
were managed as user stories through Jira. During the entire project, I was responsible for managing the UX backlog. By having frequent customer engagement sessions I was able to prioritize user stories in a sequence that provided the most customer value. Development and UX teams stayed in sync by meeting daily to review status and progress of feature builds
Overview video of the first release with primary personas
Overview video of manager persona using Studio Wall
Overview video of designer persona using Studio Wall
Overview video of digital modeler persona using Studio Wall